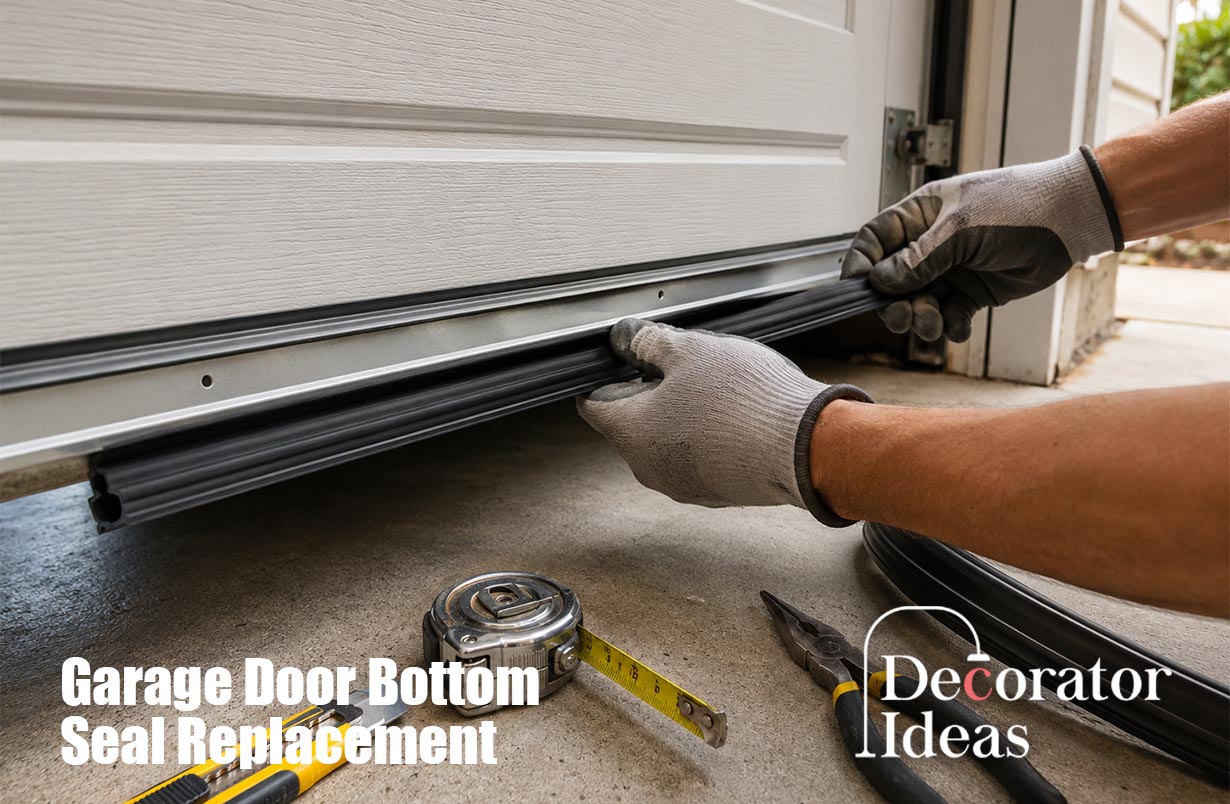
A damaged seal under your garage door can let in rain, dirt, cold air, insects, and small pests. It may also make the garage harder to clean and less comfortable. Garage Door Bottom Seal Replacement is a practical way to close these gaps and protect your car, tools, floor, and stored items. This guide explains how to identify damage, choose the correct seal, install it safely, and keep it working for longer.
What a Garage Door Bottom Seal Does
The bottom seal is a flexible strip attached to the lower edge of a garage door. When the door closes, the seal presses against the floor. This creates a barrier between the garage and the outdoor area. Most seals are made from rubber, vinyl, PVC, or EPDM.
A good seal helps block rainwater, dust, leaves, insects, drafts, and road dirt. It may also reduce noise and help control the temperature inside an attached garage. However, it is not a complete flood barrier. Strong water flow may require better drainage or a floor threshold.
Signs Your Garage Door Bottom Seal Needs Replacement
Check the seal while the garage door is fully closed. You may need Garage Door Bottom Seal Replacement when you can see daylight under the door. Other warning signs include water entering after rain, leaves collecting inside, or insects coming through the lower corners.
Touch and inspect the material closely. A healthy seal should feel flexible and return to its normal shape after you press it. Replace it when it becomes hard, flat, cracked, torn, crushed, loose, or brittle. Missing sections are also a clear sign that the seal has failed.
How to Choose the Right Seal Type and Size
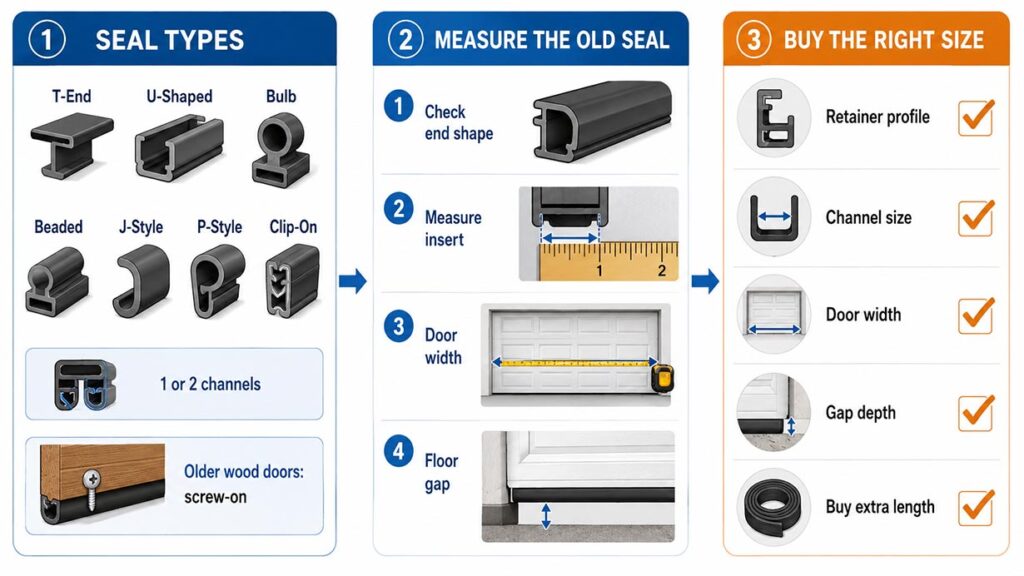
Garage door seals come in several designs. Common options include T-end, U-shaped, bulb, beaded, J-style, P-style, and clip-on seals. Some slide into one channel, while others use two channels. Older wooden doors may use a seal fixed with screws, nails, or a metal strip.
Remove a small piece of the old seal and look at its end shape. Measure the section that enters the retainer, not only the wide rubber part. You should also measure the full width of the door and the largest floor gap.
Buy a seal that matches the retainer profile, channel size, door width, and gap depth. Purchase slightly more material than you need. The extra length gives you room for fitting and trimming after the seal has relaxed.
Tools and Materials Needed for the Job
Most homeowners need a replacement seal, tape measure, utility knife, pliers, flat screwdriver, cleaning brush, cloth, mild soap, gloves, and eye protection. A small amount of soapy water or silicone-safe lubricant can help the seal slide through the retainer.
A helper is useful, especially with a wide double garage door. One person can pull the new seal while the other guides it into the channels. Avoid petroleum grease unless the manufacturer approves it. Some oils can damage rubber or collect dirt.
How to Remove the Old Bottom Seal Safely
Before starting Garage Door Bottom Seal Replacement, unplug the garage door opener. Keep children and pets away from the work area. Raise the door only enough to reach the retainer, and make sure it cannot move or fall while you work.
Some retainers are pinched at the ends to stop the seal from sliding. Open the end carefully with pliers or a screwdriver. Pull the old seal out from one side. If it is stuck, cut it into shorter pieces and remove each section slowly.
Never remove the bottom corner brackets, lift cables, springs, or cable drums. These parts may hold dangerous tension. Contact a trained garage door technician when the repair requires work near these parts.
How to Install the New Garage Door Bottom Seal
Clean the retainer before installing the new material. Remove old rubber, dirt, rust flakes, and small stones. Check for bent areas or sharp edges that could tear the seal. Allow the track to dry before using an approved lubricant.
Feed the new seal into the correct channels. Keep it straight and avoid twisting or stretching it. Ask your helper to pull gently while you guide the ends through the track. Work slowly because too much force can damage the seal or bend the retainer.
Once the seal reaches the other side, allow it to return to its natural length. Do not trim it immediately after pulling it through. Cut away the extra material after it has relaxed, then close or secure the retainer ends.
How to Fix Gaps on an Uneven Garage Floor
A normal seal can close small gaps, but it may not work well on badly cracked or sloping concrete. A deeper bulb seal or U-shaped seal may help when one part of the gap is wider. The seal must still allow the door to close normally.
For larger low areas, consider installing a garage floor threshold seal. This raised strip attaches to the concrete with adhesive and meets the door seal when the door closes. It can reduce water, drafts, and debris entering under the door.
A threshold works best on a clean, dry floor. It cannot repair serious concrete damage or poor drainage. If water flows toward the garage during storms, you may need a drain, driveway repair, or professional waterproofing work.
Common Replacement Problems and Their Solutions
If the new seal does not enter the track, its end shape may be wrong. The channel could also be dirty, damaged, or pinched closed. Do not force the material. Compare the old and new profiles, clean the track, and open the retainer end carefully.
If the seal keeps falling out, its ends may be too small for the channel. The retainer may also need an end stop or light crimping. A bent or broken retainer should be repaired or replaced before installing another seal.
After Garage Door Bottom Seal Replacement, the garage door may reverse if the seal is too thick or folded under itself. Lower the door slowly and watch the contact point. Do not increase the opener force to hide the problem. Check the seal size, position, door balance, and safety system first.
Safety Rules Every Homeowner Should Follow
The most important rule is to avoid all parts connected to the spring system. Garage door springs and lift cables can cause serious injuries if they are loosened without the correct tools and training.
Call a professional when the door is uneven, very heavy, falling, or difficult to control. You should also request help if a spring is broken, a cable is loose, the bottom panel is bent, or the retainer is badly rusted.
A basic slide-in seal is often a suitable DIY task. However, the work should never require the removal of bottom brackets, cables, springs, or other high-tension parts.
How to Maintain Your New Bottom Seal
Clean the seal with mild soap and water when mud, road salt, or dirt builds up. Remove stones, screws, ice, and other sharp objects from the floor. These items can cut, crush, or pull the seal out of its track.
Inspect the seal before winter, after heavy storms, and at the start of the rainy season. Check for cracks, flat areas, missing pieces, and spaces where daylight enters.
A successful Garage Door Bottom Seal Replacement should create steady contact across the floor without making the door difficult to move. Test the opener after installation and inspect the seal every few months. Regular care will help your garage remain cleaner, drier, safer, and more comfortable.
FAQs
How long does a garage door bottom seal last?
A good seal may last several years. Sunlight, freezing weather, water, chemicals, and heavy use can shorten its life.
Can I replace the seal myself?
Yes, many slide-in seals can be replaced with basic tools and a helper. Never work on the springs, cables, or bottom brackets.
Will a new seal stop all water?
No. It can reduce normal rainwater, but it cannot stop flooding or water under strong pressure. Better drainage may also be necessary.
How much extra seal should I buy?
Buy slightly more than the full width of the garage door. This gives you enough material for fitting and final trimming.
Can I use a universal garage door seal?
Only when its end profile and size match your retainer. Always compare the shape and channel measurements before purchasing.